TrueNas on Proxmox PVE

TrueNAS Download
First, visit the website: https://www.TrueNAS.com/download-TrueNAS-scale/
Signup, or click “No Thank you, I have already signed up”.

Copy the link for the stable version:
- (This is the stable version as of writing 24.10.2.1, but check for the latest stable version on the site.)
Inside Proxmox VE, select your local storage, then go to the ISO Images tab and click Download from URL.
Paste URL and Query URL, and then Download

Grab a drink and wait for download to complete
TrueNAS VM Setup
Still inside proxmox, select Create VM
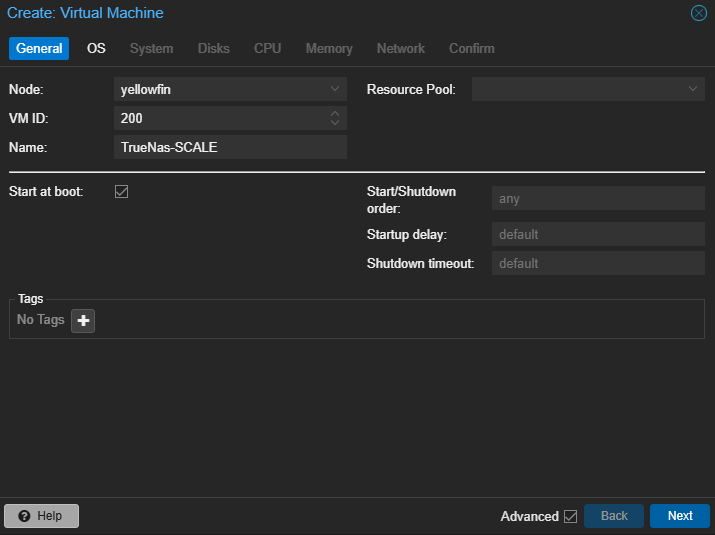
- Node: default
- VM ID: use your numbering convention
- Name: TrueNAS-SCALE
- Enable Advanced Settings
- Start at boot: check
- Click Next
- OS section
- ISO image: select TrueNAS
- If the ISO isn’t listed, verify it finished downloading.
- click Next
- ISO image: select TrueNAS
- System section
- leave as default
- select Next
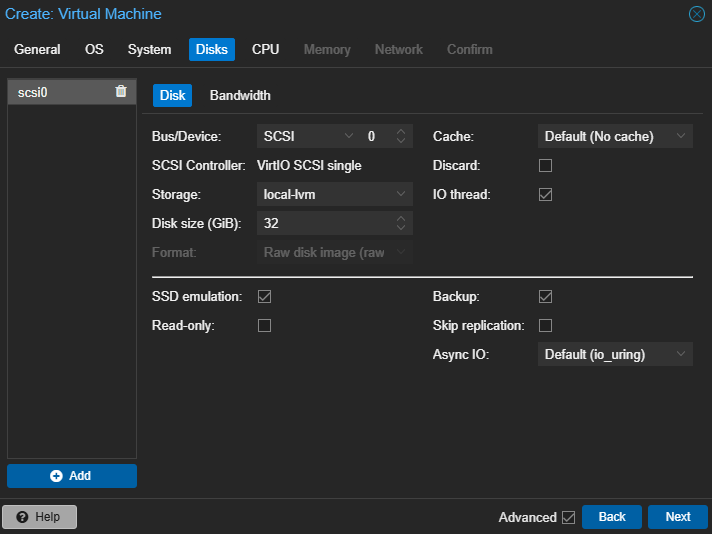
- Disks 1. Make sure Advanced settings are enabled 1. SSD emulation: check
- CPU
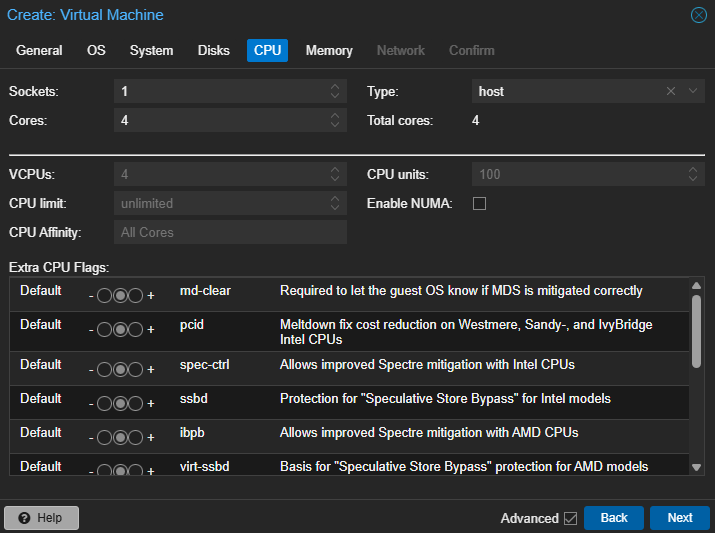
- Sockets: 1
- Cores: 4
- Type: host
- select Next
NOTE: I’m running an Intel E5-2680V3 with 12 cores, 24 threads. You may want to allocate less cores. Proxmox will allow for over allocation, but I would advise against allocating more than 200%.
- Memory - Memory (MiB): 16384 - select Next
NOTE: I’m running 62.71GiB, TrueNAS recommends 8GB. But again Proxmox allows for over allocation.
“At its most basic level, one GB is defined as 1000³ (1,000,000,000) bytes and one GiB as 1024³ (1,073,741,824) bytes. That means one GB equals 0.93 GiB.”- Source
Network
- Default is fine
- select Next
Confirm
- check Start after created
- select Finish
TrueNAS Install
- Select the VM “200 (TrueNAS-SCALE)” (top right tab in Proxmox UI)
- Console
- Installation GUI
- Install/Upgrade, select OK
- Should see 32GiB disk
- spacebar to select it
- select OK
- Warning, select Yes
- Web UI Authentication Method
- Down arrow “Configure using Web UI”
- select OK
- Legacy Boot
- Allow EFI, select Yes
- older systems may require legacy boot.
- Allow EFI, select Yes
- wait for install
- Installation Succeeded
- select OK
- down arrow to Reboot System
- select OK
- grab a drink and wait for reboot
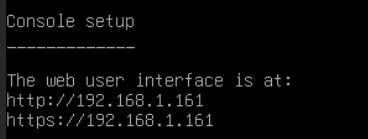
- When finished you’ll see an IP address
TrueNAS Web Interface
- “In your web browser, go to the IP address displayed in the console (e.g.,
http://192.168.1.161)
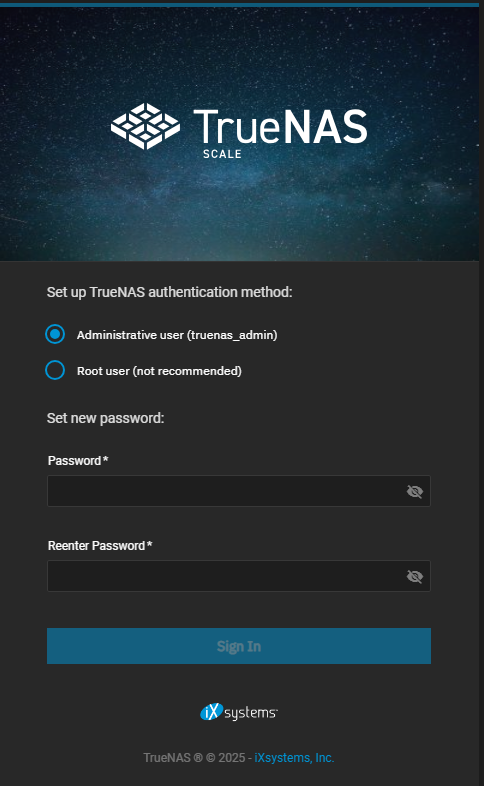
Set a strong admin password
Return to Proxmox
- select Proxmox instance
- select Disks
- Identify your disk(s) model and serial number

- open Proxmox shell
- type:
ls /dev/disk/by-id - Copy disk IDs (they match model_serial number)
- ata-ST8000NC0002-1XX112_ZA19WJ59
- ata-ST8000NC0002-1XX112_ZA1AMANT
- type:
- Select TrueNAS VM
- select Hardware
- select CD/DVD
- select remove
- confirm
- verify Hard Disk (scsi0)
- select CD/DVD
- select Hardware
- open ProxMox shell
- You’re going to mount the disk(s) to TrueNAS VM.
- Use the following syntax to attach each disk:
- select Proxmox instance
qm set <VM_ID> -scsi<X> /dev/disk/by-id/<DISK_ID>
- Replace
<VM_ID>with the ID of your TrueNAS VM (e.g.,200) - Replace
<X>with the SCSI slot (e.g.,1,2, etc.) - Replace
<DISK_ID>with the disk identifier you copied earlier
Example:
qm set 200 -scsi1 /dev/disk/by-id/ata-ST8000NC0002-1XX112_ZA19WJ59
qm set 200 -scsi2 /dev/disk/by-id/ata-ST8000NC0002-1XX112_ZA1AMANT
- After running these commands, go back to Proxmox > TrueNAS VM > Hardware. You should now see the new SCSI drives listed.

Return to TrueNAS web portal
- Select Storage
- Disks
- and we should see the new hard drives

- Select Storage again
- select Create pool
- General Info
- Name:
HDD8000(use whatever works for you. I’m using 8TB so 8000) - select Next
- Name:
- Data
- Layout:
Mirror(use whatever works for you. I’m using 2X 8TB HDDs. I’d have done RAIDZ1 but couldn’t get a third HDD. You can hover your mouse over each option for more information.) - select “Save And Go To Review”
- Layout:
- Review
- Verify MIRROR
- select Create Pool
- check Confirm
- select Continue
- Will automatically be sent to “Storage Dashboard”
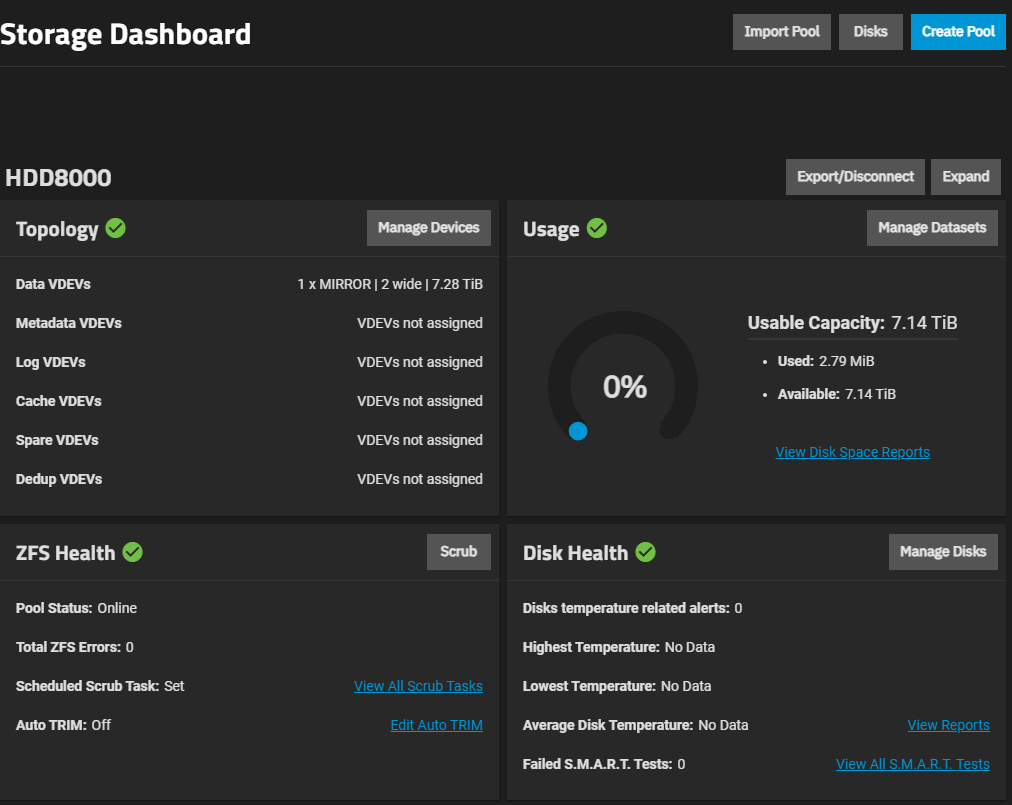
- Select Datasets (left panel)
- Select Add Dataset
- Name:
personal_backups - select Save
- graph will update to show new child dataset
- Name:
- Select Add Dataset
- Select Storage

- This will allow for permission controls for network shares.